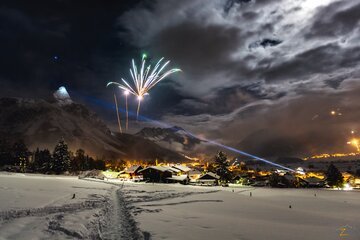
PHOTOS IN THE SNOW: THIS IS HOW TO REMEMBER WINTER FUN IN THE TIROLER ZUGSPITZ ARENA
A winter landscape covered in deep snow is fascinating. But capturing this exhilaration in a picture presents its own challenges. The amateur photographers of FroZen Lights from Ehrwald and Lermoos give tips for a successful photo in the snow.
Sjef Handels enthuses: "Take advantage of the golden hour in the morning or in the evening." The amateur photographer knows what he's talking about: As FroZen Lights, he and his colleague regularly post impressions from the Tyrolean Zugspitz Arena. On Instagram, 1,400 subscribers now follow the dreamlike snow views of frozenlights_zugspitzarena.
So for good photos in the snow, Handels recommends taking pictures when the sun is rising or setting and low. "The contrasts between light and dark, the longer shadows and the golden sunlight create a magical atmosphere." In addition, he says, the blue of the sky is more intense in winter, which is why golden hour is also called blue hour. In general, he says, it's easier to take photos with a small digital camera or smartphone in the morning and afternoon because the lighting conditions are clearer.
Blue cast and white balance: the pitfalls of photos in the snow
Because in broad daylight, snow tricks cameras and smartphones. The abundance of white and the light it reflects ensure that the images are automatically underexposed - in other words, too dark. On the camera, this can be prevented by increasing the ISO number, "preferably to 100 and higher," says Handels. This makes the image sensor more sensitive to light. Smartphones need an app for this, such as Manual Camera for Android and Pro Camera for iPhones.
Another problem is the bluish cast that snow surfaces can have in photos. This effect occurs because the snow reflects the blue of the sky. "The blue cast can always happen," Handels says. That's why he advises manual white balance, if the camera provides this function. Handels' tip: Take several pictures of the same subject with different ISO or white balance settings.
RAW instead of JPEG: more details for better retouching
The last resort is subsequent correction on the computer. Sjef Handels recommends that ambitious amateur photographers use free image editing software such as Gimp, Picasa or Paint.net. If you want to edit after the fact, you should set your camera or smartphone to save the images in RAW raw format rather than JPEG. The reason: JPEG is a space-saving format, and the files are compressed. Details are often lost in dark or light areas of the image. With RAW, on the other hand, the photo ends up untouched on the memory chip. It captures the highest possible image quality. So it can be retouched well and the pitfalls of photos in the snow can be reworked. But beware: raw formats produce large files, and the memories fill up quickly. So having a second SD card on hand is worthwhile.
Photographing with commitment: one subject, different settings
"You have to take your time," says Sjef Handels. "If you shoot spontaneously, you can of course be lucky if the lighting conditions happen to be right. But just as much bad luck." That's why he advises it's better to take fewer photos and put more effort into them, especially when it comes to choosing a subject. Because there are incredibly beautiful moments for photos in the snow, the photographer knows, but they need commitment to capture. For example, the aforementioned golden hour: get up early in the morning, wait for the sun, have the motif in mind, prepare the camera. And take several photos of the snowy landscape in different settings. "Then the hit rate for a beautiful souvenir picture increases considerably," he knows.
So those are the technical tips and tricks for successful photos in the snow. In the second part of our winter photo special, Sjef Handels reveals what you need to bear in mind when choosing your subject.


