

Childhood dream of building an igloo: Tips and tricks from the outdoor professional from Lermoos
So much snow and so much time - what can you do with it right now? Building an igloo, for example! But realizing the children's dream in their own backyard is harder than expected. How good that back then, when group activities were still possible, we took part in an igloo building course by Marco Seitner. With the tips and tricks that the winter professional and owner of the Alpine School Lermoos gave us, even the snow house in the garden becomes a real experience.
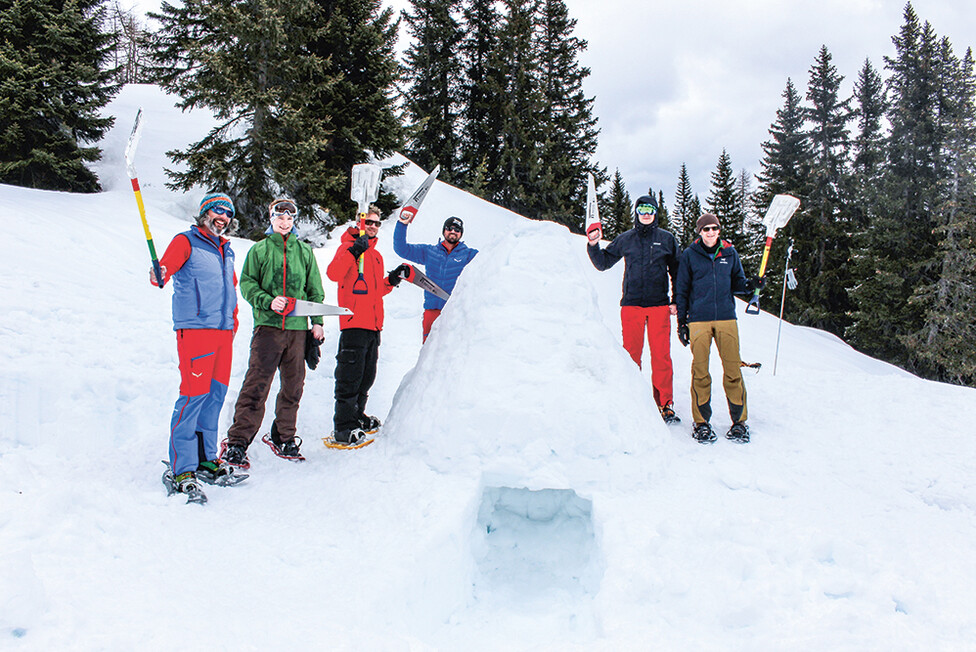
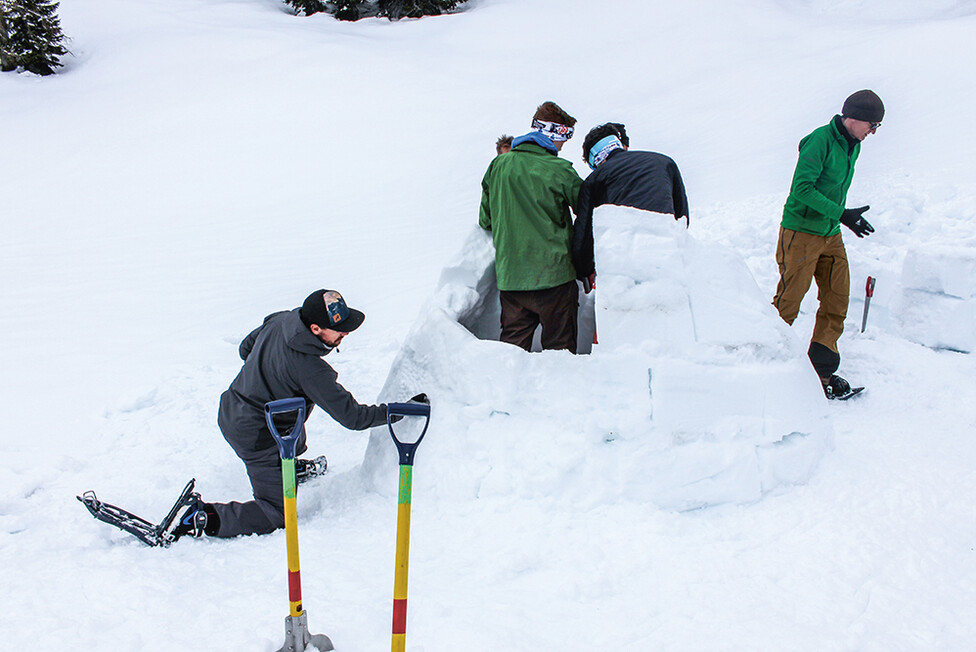
Reaching the goal together: building an igloo is teamwork
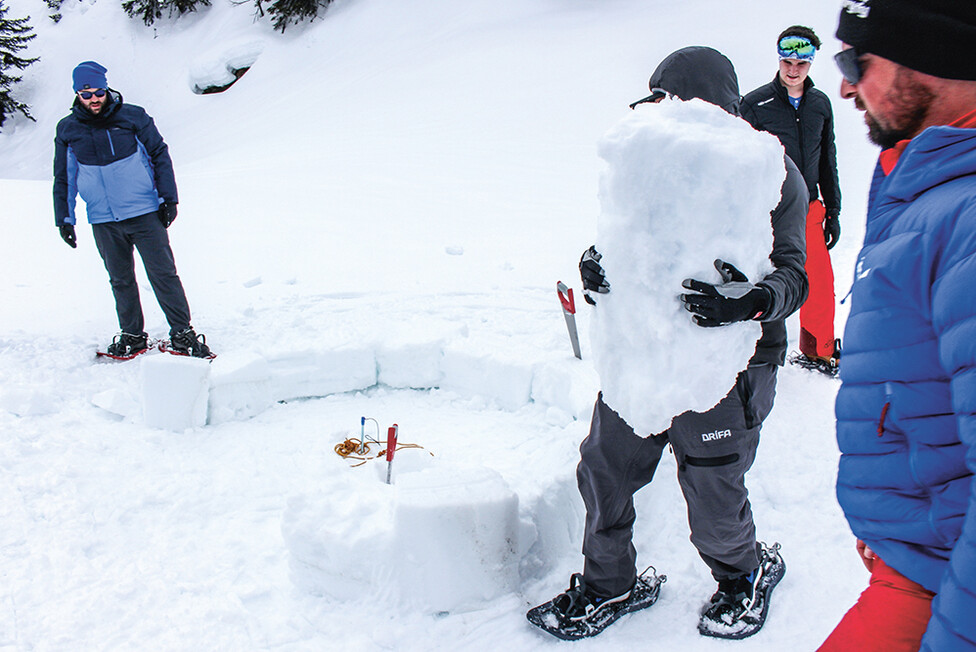
First of all, the right equipment is important: In addition to all available helping (and family) hands, saws and shovels are absolutely necessary. Then the only thing missing is the right "building site": In his igloo-building course, Seitner measures out a diameter of two meters for this. "For an igloo of this size, it takes four of you about three to four hours - that depends on the one hand on the snow conditions and on the other hand, of course, on the motivation of the team," explains the outdoor fan. And then it's time to get started: To build an igloo, the hard-working helpers first have to dig a trench. Once that's deep enough, it's down there to saw out the first snow blocks - which sometimes crumble right away. "That's because of the weather," explains Marco Seitner. "If it has rained a lot, we have a layer of disturbance in it. Underneath, however, the snow is then nicely compressed. So there's only one thing to do: dig deeper!" If the snow is nice and "sticky," however, the blocks retain their shape. They can then be placed around the trampled circle on which the structure is to be built. The igloo building process is particularly fast in a team: One person saws, the next passes the snow blocks to each other, and the last person places them on the ever-growing snow wall.
Three-point rule for a stable childhood dream
It is now best to have one or two helpers from inside the igloo to ensure the stability of the snow wall. One thing is particularly important when building an igloo: the three-point rule. Each newly placed block must be in contact with the lower and side blocks at three points. If this is observed, the igloo will withstand even strong winds and snowfall.
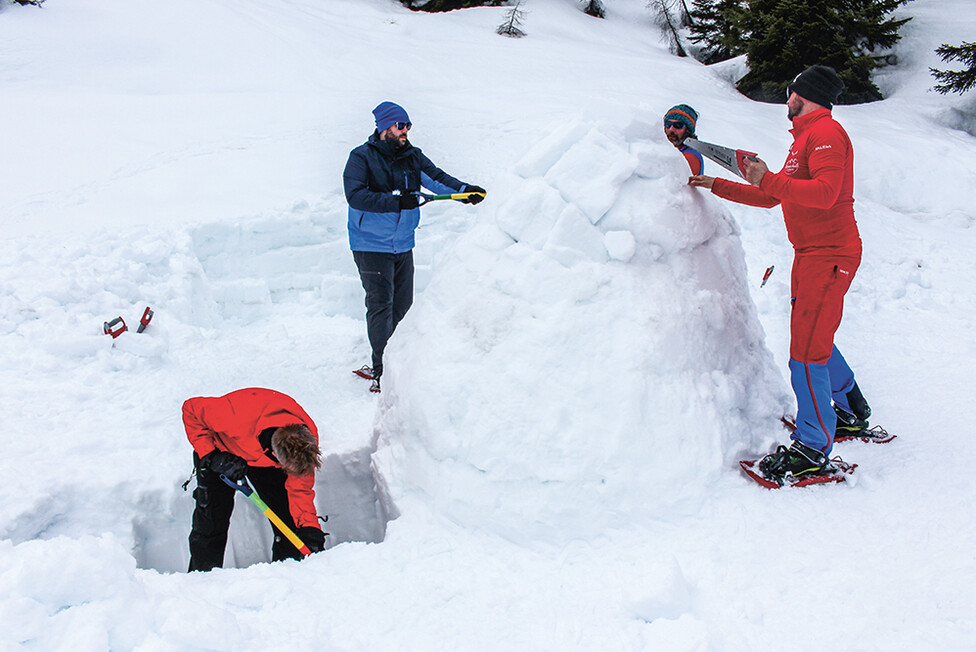
Block by block, the childhood dream of your own igloo comes true. In the end, only the hole at the top remains open: The keystone is cut to size like a diamond. Once it sits on the igloo, the work is as good as done. Now the cracks and holes have to be grouted from the outside and inside. Finally, the igloo is given an entrance. After all, the helpers who grouted from the inside have to be let out of the igloo again: "To do this, we dig a trench from the outside so that we can later walk into the igloo from below. As we know, warm air rises to the top. If the hole were at ground level, too much heat could escape and too much cold could come in," explains Marco Seitner. If you build an igloo properly, it's always about zero degrees Celsius inside. Good winter sleeping bags can withstand temperatures as low as -30 degrees Celsius, so it stays snug and warm even when you spend the night - another childhood dream that wants to be fulfilled.
As soon as it is possible again, Marco Seitner and his Alpine School Lermoos will offer great outdoor activities again. Until then, we wish you lots of fun in your very own igloo.


